
Hi, Readers!

I’m an 18 year old high school student who is fulfilling their experiential learning credit by working for Dusk Till Dawn. I began working for Dusk Till Dawn in October of 2025 in order to learn about the online art business world. Art has been a huge part of my life since I was first handed a piece of paper and crayons and I’ve always enjoyed drawing and painting since I was young.
In February of 2026, I was sent 5-7 products from Dusk Till Dawn studios to paint and document my experience. Despite my experience as an artist, I’ll admit that I’ve never had an experience painting resin products before. But after 4 months, I’m happy to say that as a beginner, everything went smoothly and I’m taking this time to share my experience for anyone else who wants to start painting Dusk Till Dawn products but is unsure of what to do when they receive their products or what to expect.
First Impressions
I received my products in a small box and when I opened it, all the products I received were safely secured in the box and everything came to me in one piece without any broken or dented pieces. The products I received were 2 torsos, 3 heads and 2 pauldrons.
These products I received were created with gray resin and they were all super light, small and the surface of these products were very smooth. This was the first time I’ve ever held anything made with resin and I really appreciated how slick the surface of these products were since that’d make it easier to paint.
Now for the fun part: the painting. In the past, I’ve painted on canvas’ and on sheets of paper but this was my first time painting on anything resin printed before. I’ll share my painting process though since I think it’ll be really helpful for people to hear from a former beginner.
For anyone wondering, the type of paint I used to paint these products was acrylic paint. You don’t anything expensive. There’s acrylic paint available at dollar stores that work just fine if you’re on a budget!
My painting process


1. I started by using primer on these products before painting them. It’s important you prime your products outdoors. The reason we prime products before painting is so that there is a base coat on your product that helps glue on the paint more easily. But for anyone who doesn’t have primer available, I also tested what it feels like painting a product without primer. Both work well perfectly but primer definitely helped the paint dry quicker.
2. After that, I applied layers of white paint to my product. For this part, I diluted my white paint with water in order to prevent any large chunks from covering up details on the products I was painting. I applied about 3 layers of white paint onto the products I was painting.
With each layer, make sure the layer before is completely dry before applying the next layer. The reason I chose to do this is so that any colours I was planning to use later would be more vibrant and pop more. The colours you plan to use may not turn out how you imagined if you just apply colour onto the grey of the resin.

This part took a lot of patience since I had to make 100% sure there was no grey poking through the white paint, but if there was, I’d have to go back to painting over with a layer of white. Make sure you’re being extra aware that you’re covering every corner of your product during each layer that is being added.
3. When your white layer of paint dries, we can paint on our colours. This was a very fun part of the painting process since this is the part where you can let your imagination run wild now. You can paint now as if you were painting on a canvas.
A quick tip, you may also want to dilute the colors you use here with water, similar to what we did with the white paint. As I mentioned before, I did this to prevent any chunks from covering up small details on the products like the eyes, ears and strands of hair.
When you dilute the colours, you’ll need to apply multiple layers here as well. It sounds like a lot of unnecessary work but I promise, the end result is 100% worth it.
4. Finally, the last step of our process is to apply a coat of Mod Podge. For those unfamiliar, Mod Podge is a glue sealer that I used in order for my piece to look more glossy and shiny in the end.
Another reason I used Mod Podge was to prevent the paint from cracking; the Mod Podge helps lock in the paint and prevent any paint from peeling off.You only need one layer of Mod Podge, no need to dilute it. When you apply the Mod Podge, it will look like white paint. That is completely normal. When it dries, it will turn clear and make your product look shiny and smooth.
Now this part of the process was my favourite! It was really rewarding to just be able to paint all over the figures instead of having to be really precise about which section you’re painting,
Final Thoughts

And now we’re done! I also cannot forget how proud I was of how all my work paid off.
I definitely recommend painting products to anyone who might be slightly interested. I had a lot of fun painting these products while listening to music or listening to a podcast, I was surprised with how this entire experience was actually very therapeutic and relaxing for me.
The most fun part of this process for me was mixing colors together to make the right color for these products. I restricted myself to only the basic colors such as red, yellow, green, blue, white and black so I had to do a lot mixing to get the perfect color peachy color for the skin.
I didn’t have any orange paint available so I had to mix some colors until I felt satisfied. This took a lot of trial and error but in the end, I found myself feeling really rewarded with the end result.
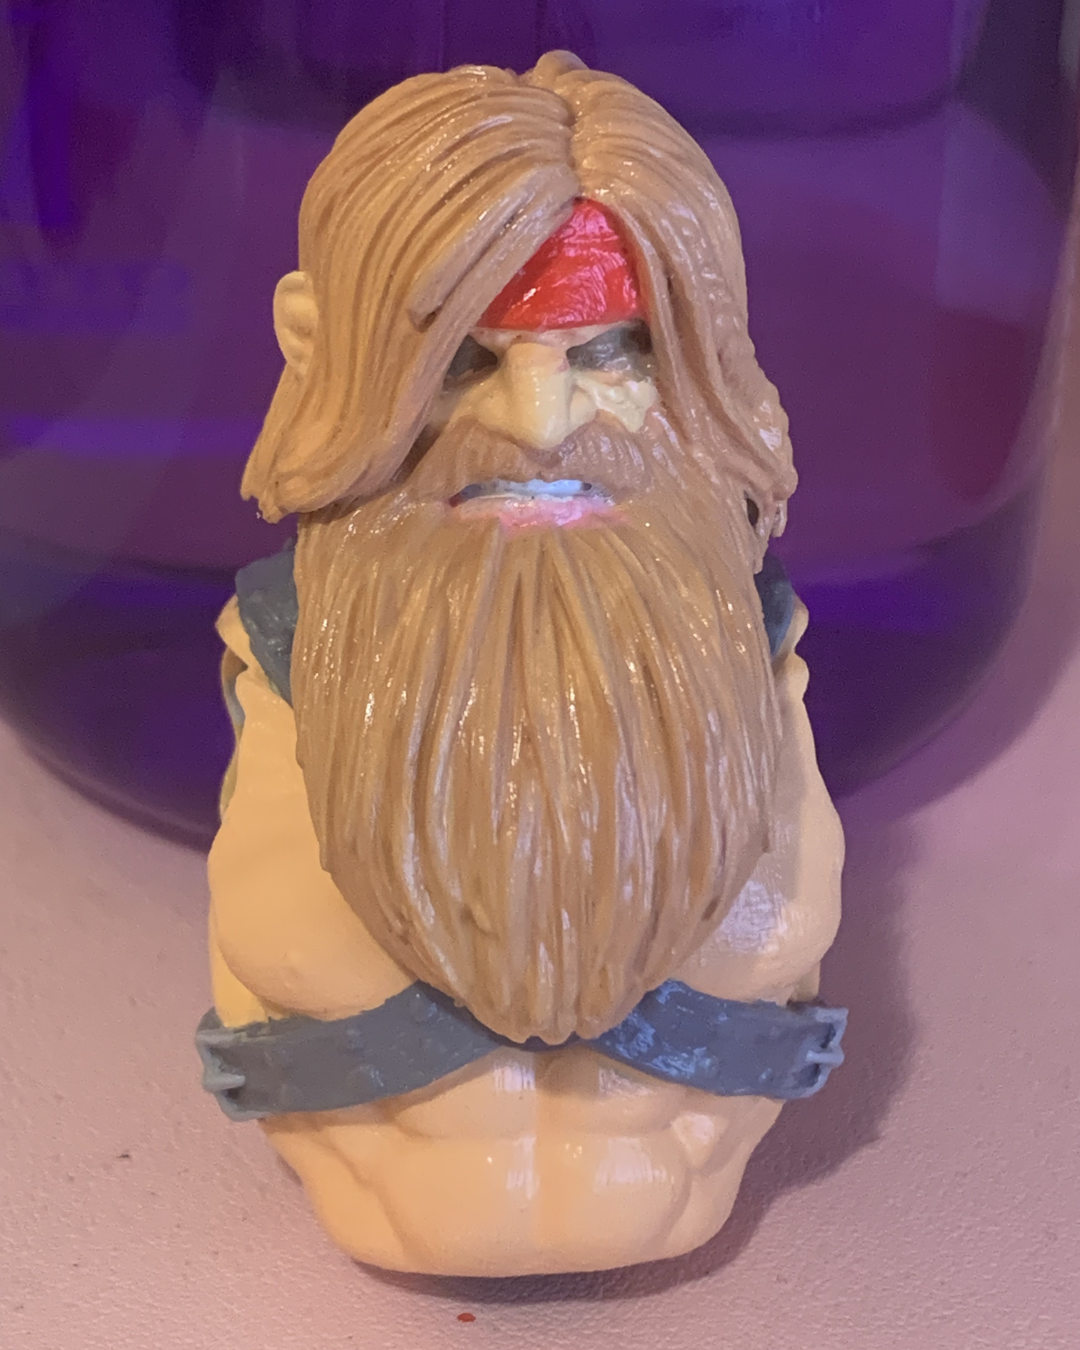
Throughout the process, I did struggle with being precise with each section I was painting. For example, with the torso, I was having some trouble painting the belt over the chest and preventing any of the grey paint from getting on the skin.
I had trouble with this since I naturally have really shaky hands and some of my paint brushes weren’t small enough to stay in one section. But with a lot of patience and painting over the mistakes with paint, I eventually finished painting the torso and made it something I was proud of.
For anyone who is a beginner like I was 4 months ago and is a little more interested in painting Dusk Till Dawn products after reading this, I 100% recommend and encourage you to follow in my footsteps. I hope that showing my painting process can encourage you to start your painting journey.
This experience was far out of my comfort zone but in the end, it really strengthened my appreication and love for the entire painting process. It helped me realize that art isn’t about making it to end of the finish line, it’s about the run there and how it makes you feel.

THANK YOU FOR READING!
↓ LINKS TO THE PRODUCTS I RECEIVED ↓
– GOBLIN TORSO –
– GOBLIN HEAD –
– ROGUE ORC HEAD –
– DWARF HEAD –